
If your XY dimensions come out consistently “a little off,” XY belt tension is often the missing link. The goal is simple: remove belt slop (backlash) without making the system stiff enough to cause binding, extra friction, or premature wear.
This guide walks through the full tuning loop: identifying belt slop vs over-tension, measuring backlash, checking that the XY axes are square, and verifying the fix using calibration geometry you can measure with calipers.
Check Symptoms of Belt Slop and Over-Tension

Start by getting a feel for both extremes:
- Belt slop (too loose) often shows as a noticeable “dead” movement right after reversing direction. You may also see inconsistent line placement when the print changes direction.
- Over-tension (too tight) usually feels harsh: higher resistance when you move the carriage by hand (with power off), more noise, and sometimes a vague sense that the axis struggles to move smoothly at speed.
Practical checks (with the printer powered off for safety):
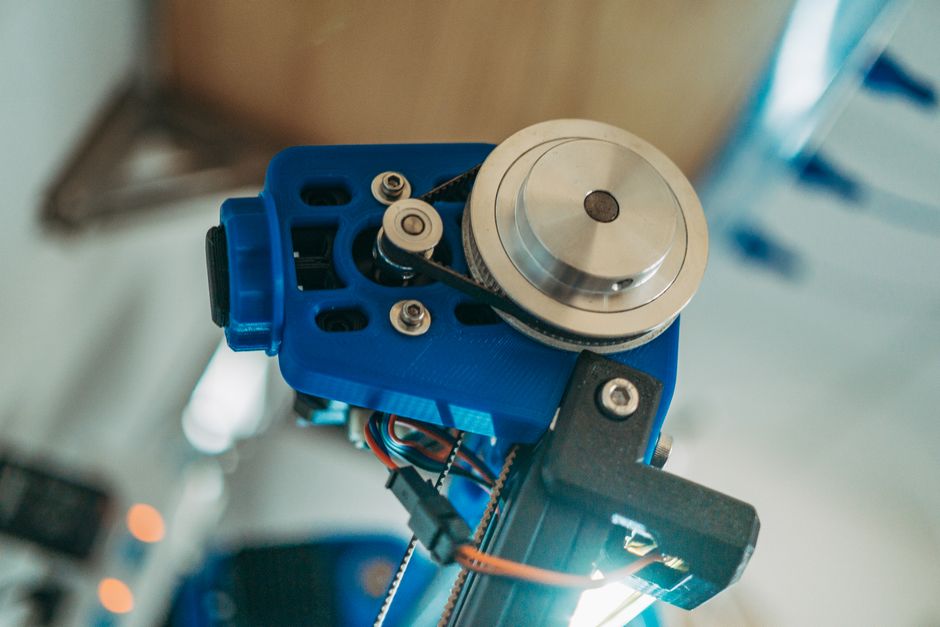
- Look at belt tracking and routing. Belts should run straight and centered on pulleys and idlers. A drifting belt can mimic slop because the teeth engage unevenly.
- Check tensioner travel. Many printers use an idler pulley eccentric, a screw tensioner, or a movable motor mount. If you’ve already “maxed out” the adjustment, you likely have a belt routing or mounting issue rather than a tuning issue.
- Feel for compliance. If you can easily deflect the belt with light fingertip pressure, it’s probably under-tensioned. If it feels drum-tight and the axis feels difficult to move, you may be over-tensioned.
Why this matters: under-tensioned belts stretch and allow tooth engagement to shift slightly, which increases dimensional error—especially in features formed by multiple direction changes (perimeters, holes, and corners). Over-tension increases friction and can introduce other artifacts (like uneven motion) that also harms accuracy.
Measure Backlash and Axes Response

You’ll want to measure how much the axis moves before the carriage actually catches when you reverse direction.
Use one of these approaches:
- Dial indicator method (best): Attach a dial indicator or a comparably rigid measurement setup to the moving carriage/toolhead and measure displacement on direction reversals.
- Dial-caliper method (good enough): With power off or on a safe setup, use calipers to measure position changes at the carriage/toolhead relative to a fixed reference. For reversals, repeat the measurement multiple times and focus on consistent differences.
A simple repeatable procedure:
- Pick a direction pair to test (for example, X+ then X−, then Y+ then Y−).
- Perform small controlled moves using your printer controls (manual move, if available) or by using a G-code test pattern.
- Record the repeatable “lost” motion before the carriage motion begins when reversing.
What to look for:
- If the “lost” motion is obvious (even a fraction of a millimeter), your belts are likely under-tensioned or the belt path/pulleys have alignment issues.
- If the axis moves immediately on reversal but your prints still show skewed or inconsistent dimensions, you may have square/alignment issues or pulley/bearing drag rather than belt slack.
Why this matters: dimensional inaccuracies often come from reversal-related errors. Tensioning can reduce backlash, but it won’t fix a frame that’s not square or an axis that binds.
Check That the XY Axes Are Square
Even with perfect belt tension, XY dimensional accuracy will suffer if X and Y are not at 90°.
You can verify squareness in two complementary ways:
- Mechanical square (alignment check): Check that the moving ends and corners are built consistently. If your printer has adjustable corners or belt idlers mounted to squaring brackets, confirm they’re not tilted.
- Measurement-based verification (most reliable): Print a calibration geometry that forms known squares/rectangles, then measure the results.
A measurement-based squareness test:
- Print a flat calibration part that includes a known-size square outline (and ideally a second one that is slightly offset or uses a different orientation on the bed).
- Measure at least three distances: left-to-right, front-to-back, and both diagonals (corner-to-corner).
Interpretation:
- If diagonals don’t match closely (and especially if one diagonal is consistently larger), you likely have an XY squareness problem.
- If dimensions are consistent but slightly larger/smaller, that’s more likely a belt-scale/firmware step calibration or extrusion/flow issue—tension is only part of the story.
Why this matters: many “belt tension problems” look like squareness errors on prints, because direction changes happen at corners. Fixing tension while ignoring squareness can leave you chasing the wrong cause.
Tune Belt Tension in Small Increments
Now that you know what you’re trying to fix (slop vs backlash vs squareness), tune the belts gradually.
The safest tuning mindset is: adjust a little, measure a little, repeat.
Use the hardware your printer provides:
- Eccentric idler pulley: rotate/turn until tension improves, then lock it.
- Screw tensioner: turn the screw in small increments, then lock.
- Motor mount adjustment (less common): move the motor mount slightly and re-lock.
Work through these steps:
- Move the toolhead to a neutral belt state (not at a hard stop). This reduces the chance you measure tension while the belt is loaded oddly.
- Adjust only one axis at a time (X, then Y). This makes it easier to tell which change actually reduced backlash.
- Tighten in small increments and re-check backlash behavior with direction reversals.
- Watch for binding signals after each adjustment: higher effort to move by hand (power off), unusual noise, or irregular motion. If you notice binding, back off slightly.
- Confirm pulley and idler alignment before you lock down fully. A mis-tracked belt can feel “tight” yet still introduce effective slack.
- Re-check diagonals and corner geometry if the last calibration part showed skew. Tensioning can slightly change belt load and affect how the carriage seats.
- Repeat the backlash measure (same move size and same reversal pattern you used earlier) so you’re comparing apples to apples.
- Lock everything down and repeat one final print to confirm the dimension improvements.
Where to land (practical target): you’re aiming for the point where direction reversals show minimal lost motion, while the system still moves smoothly and predictably.
Why this matters: belts are a compromise. Slightly too loose adds backlash; too tight adds friction and can introduce different kinds of motion error.
Verify With Printed Calibration Geometry
Once tension and squareness checks are aligned, the final proof is the print.
Use printed geometry that reveals both belt compliance and axis geometry issues:
- A known-size square/rectangle (multiple orientations if you can) is excellent for spotting scaling differences and squareness.
- A direction-change-heavy feature (like perimeters around a small square and then a larger one) helps reveal reversal-related artifacts.
A good workflow:
- Print a geometry set with clear measurement points. Choose features that you can measure with calipers without guessing (outer walls, inner gaps, and corner locations).
- Measure consistently: same caliper method each time, and always measure the same features (outer edge-to-edge, not “eyeballed centerline” measurements).
- Compare before/after: keep the printer settings the same (speed, temperature, cooling) so the belt tension change is the variable.
Interpreting results:
- If measurements improve and corner behavior is consistent, you likely hit the right tension.
- If one axis remains off more than the other, revisit that axis belt path, pulley alignment, and backlash measurement.
- If dimensions still show systematic skew (one corner always “wins”), go back to squareness and frame seating.
Why this matters: motion-level backlash can be small but still show up in print geometry; conversely, prints can look off even when backlash is solved if the XY frame isn’t square.
What to Do Next Based on the Result
If your printed XY dimensions are off, match the symptom to the likely cause:
- Off only at direction changes (corners/perimeters): belt slop/backlash is still present—return to the backlash measurement and fine-tune tension.
- Off in a consistent skew pattern (diagonals differ): focus on XY squareness and mechanical seating before chasing tension.
- Print looks “stiff” or motion is noisy/hard after tightening: you may be over-tensioned—back off slightly and re-measure backlash.
Once the calibration geometry matches closely and repeatably, keep a short log: belt adjustment direction, how much you turned/rotated, and the measured dimension change. Next time you swap belts or service pulleys, you’ll know exactly where “good” lives for your printer.
PriceIt3D may earn a commission when you buy through links on this page, at no extra cost to you. Affiliate notice.