
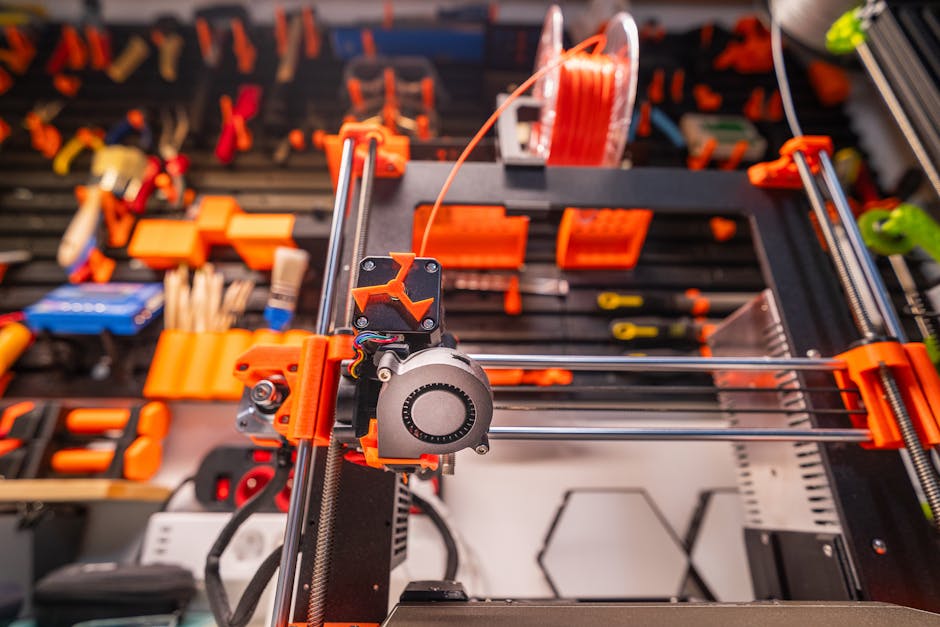

ABS and ASA print best when the chamber stays warm enough to resist warping—but the same heat that helps print quality can also trap fumes. The “best” home enclosure is the one that manages both: stable temperature retention and a venting setup you can run safely.
This guide ranks practical enclosure options and breaks down what each choice means for print reliability, air handling, and real-world maintenance like bed leveling.
1) Purpose-built insulated enclosure with a designed vent port

A common example is The Original Prusa Enclosure.
Strengths
- Temperature retention you can count on: insulated walls and a mostly enclosed chamber reduce drafts, which helps prevent the “corners lifting” problem common with ABS and ASA.
- Vent planning is easier: purpose-built enclosures typically make it simpler to add a duct, place a fan, or route an exhaust line without constantly modifying the printer itself.
- Maintenance access tends to be practical: look for door/panel layouts that let you reach the bed and power/control parts without fully dismantling everything.
Weaknesses
- Fumes safety still depends on your setup: even a well-made enclosure won’t make venting optional. You still need a path for exhaust.
- More enclosure volume can mean longer heat-up: the chamber may take longer to stabilize, which can affect print prep time.
Rank this highest if your priority is “set it up once and run prints reliably,” especially if you already know you’ll vent to outside.
2) Acrylic-and-metal cabinet enclosure with adjustable exhaust
Strengths
- Good viewing for live troubleshooting: you can watch first-layer behavior and stringing without opening the chamber.
- Flexible vent control: the best designs include a vent opening and a way to tune fan speed or airflow. That matters because you’re balancing two goals: reducing drafts (for print quality) and removing fumes (for safety).
- Stable physical access: cabinets often have hinged doors or removable sections, making bed leveling and nozzle checks more repeatable.
Weaknesses
- Sealing quality varies: acrylic builds can leak air if gaskets aren’t solid. Leaks can reduce temperature retention and make venting less predictable.
- You must manage the exhaust direction carefully: an exhaust that pulls air from the “wrong” side can create localized flow that cools part of the chamber.
If you like adjusting airflow and you’re comfortable verifying seals and routing a duct, this option is often a sweet spot for ABS/ASA at home.
3) DIY wood or plywood cabinet with high-temp lining
A well-planned DIY cabinet can be excellent for temperature retention because wood/plywood is easy to build and can be insulated or lined. The key is doing it in a way that keeps heat in while still providing a safe exhaust path.
Strengths
- Strong temperature retention potential: a dense cabinet with insulation and a tight door usually reduces temperature swings, helping layers stay bonded.
- Cost-effective materials and customization: you can design access for bed leveling and maintenance around your specific printer layout.
- Space for a proper duct: DIY builds make it easier to create a dedicated exhaust route to outside.
Weaknesses
- You must be deliberate about heat, smell, and clean routing: DIY designs can unintentionally create stagnant air pockets if the airflow path isn’t thought through.
- Door fit controls everything: a cabinet that isn’t sealed well will draft like an open printer even if it looks enclosed.
Choose this if you want maximum control over design and access. Aim for a simple, reliable exhaust path (not “fumes somewhere in the room”) and build the door like it matters.
4) Filtered grow-tent enclosure with ducting
A grow tent can work when you need an enclosure quickly, but it must be treated as a venting system first, not a “filter box.” For ABS/ASA, stability and safe airflow matter more than convenience.
Strengths
- Fast to set up: tent-style enclosures are easy to adapt, and you can get them running quickly.
- Flexible exhaust routing: you can often connect ducting to an inline fan and route it out of the room.
- Good for managing cable/bed access: tents can have side access and removable panels.
Weaknesses
- Temperature retention is less predictable: fabric walls and airflow gaps can lead to more variation than rigid cabinets.
- Filtered setups can mislead: carbon/particle filters may reduce odor and particulates, but they’re not a guarantee of complete fume handling. If fumes are a concern, ducting exhaust outdoors is the safer direction to prioritize.
- Bed leveling still requires access: tents can make frequent adjustments easier, but the airflow disturbance from opening can be noticeable.
Pick a grow tent when your space limits rigid builds, and when you’re willing to commit to good duct routing and stable operation (including minimizing door openings mid-print).
5) Printer enclosure add-on with heat curtains and modular doors
If you’re not ready to build a full cabinet, an add-on enclosure around the printer can still improve ABS/ASA results by reducing direct drafts. The success of these setups depends heavily on whether they meaningfully reduce airflow and whether venting is integrated.
Strengths
- Lower footprint: useful for desks, small workshops, and setups where a cabinet won’t fit.
- Better day-to-day access: modular panels can make bed leveling and maintenance more convenient.
- Quick iteration: you can adjust the vent location and airflow baffles without rebuilding a whole enclosure.
Weaknesses
- Heat retention may be limited: small enclosures warm up less uniformly, especially with room drafts or HVAC vents.
- Vent placement is easy to get wrong: an exhaust that pulls too directly across the print can cool the chamber locally, potentially increasing warping or rough surface finish.
- More chance of leakage: add-ons often don’t seal as well as cabinets, which can reduce the benefits.
Choose this if you mainly need draft control and access, and you’re willing to test your airflow carefully until your prints stop warping.
Which enclosure type fits your ABS and ASA prints
For most home makers, the best choice depends on how you want to balance reliability, safety, and maintenance time.
- Pick option 1 (purpose-built insulated enclosure with a vent port) if you want the most straightforward path to stable chamber conditions and practical maintenance. It’s a strong match when you plan to vent to outside and you want a calmer, repeatable workflow.
- Pick option 2 (adjustable cabinet with exhaust control) if you value visibility and you’re comfortable tuning fan speed/airflow while ensuring seals are solid. This is a great fit when you want more “hands-on” control without DIY-from-scratch complexity.
- Pick option 3 (DIY wood/plywood cabinet) if you want maximum customization, including exactly how you access the bed and route ducting. This works best when you’re deliberate about sealing and designing an intentional airflow path.
- Pick option 4 (grow tent with ducting) if space is tight or you need a quick enclosure, and you’re willing to treat the setup as a ventilation project. It’s more sensitive to drafts and can require more testing.
- Pick option 5 (modular add-on with heat curtains) if you mainly want draft reduction and easy access, and you’re okay with potentially less stable chamber temperatures than a full cabinet.
The one thing to do next: decide your venting direction before you commit to an enclosure. If you can route exhaust safely out of the space, you’ll be able to use temperature retention for print quality without trading away safety.
PriceIt3D may earn a commission when you buy through links on this page, at no extra cost to you. Affiliate notice.



