
Food-contact safety with resin prints is less about the word “safe” and more about the finishing process that happens after printing. If you want items that touch food reliably, you need to understand what “safe” claims usually mean, how fully the resin cures, and how you prevent uncured material from ever contacting food.
This guide covers the resin categories that are commonly marketed for food-contact use, what “safe” really depends on (cure/finish/barrier), and which printer types and cleaning steps matter most.
What “Food-Safe” Means for Resin Prints

In practice, “food safe” for 3D printed resin typically hinges on three layers of control:
- Degree of cure: Resin must be fully cured so it stops leaching unreacted compounds. Incomplete cure is the most common reason for food-safety problems.
- Surface condition: Even a cured print can have micro-texture, roughness, or tiny surface defects that make it harder to clean and easier for residues to hold onto.
- Barrier strategy (often required): Many resin “food-safe” setups rely on a food-safe coating or barrier layer so the food never directly contacts the printed polymer surface.
That means the “best resin” depends on what role your print plays: a disposable mixing tool vs. a reusable spoon-rest vs. a direct-contact container surface are very different risk scenarios.
Resin Categories Commonly Marketed for Food-Contact Use

Look for one of these marketing directions (and treat the fine print as the real answer):
- “Food-contact safe” resins (with conditions): These are typically marketed as safe once fully cured and under specified handling/finishing conditions.
- Biocompatible resins (health-related claims): Some resins are marketed for medical or dental use. Those claims don’t automatically transfer to food-contact use, but they can be a hint that the chemistry is designed for controlled contact when cured and handled properly.
- Resins paired with “barrier-coated use” guidance: Some brands effectively assume a coating will be applied after printing. In that case, the resin is only part of the safety system—the coating and curing/handling instructions are equally important.
- Heat-resistant resins for hot-contact scenarios: Food-contact doesn’t always mean room temperature. If your print will see warm liquids, you’ll need guidance on thermal behavior and whether the coating (if used) is also suitable.
- Functional “low-leach” positioning (often still conditional): Some resins are marketed around low odor, stability, or reduced migration. Again, “reduced” isn’t the same as “guaranteed,” so you still need full cure and correct finishing.
Avoid assuming that every resin is interchangeable. Standard hobby resins are often designed for appearance or strength—not for direct, repeated food-contact.
Printer Types and Cleaning Steps That Matter Most
Your resin printer type doesn’t replace chemistry and finishing, but it strongly influences how reliably you can achieve consistent curing and how much mess you have to manage.
LCD/DLP resin printers
Most hobby resin printers use UV light in an LCD or DLP system. That matters because:
- Exposure consistency affects cure: A print that is slightly underexposed (or pulled too soon) is more likely to remain uncured in tiny crevices.
- Wash and handling practices matter: Cleaner parts start with cleaner prints. If uncured resin remains trapped in supports or corners, it can keep leaching later.
A sealed, purpose-built resin workflow is an advantage because it reduces stray contamination around your work area. For example, machines like ELEGOO Mars 3 Ultra are designed around the LCD/DLP resin-printing process, which you should pair with disciplined washing and post-curing.
Wash-and-cure workflow
Even with a great resin, safety depends on what happens after printing:
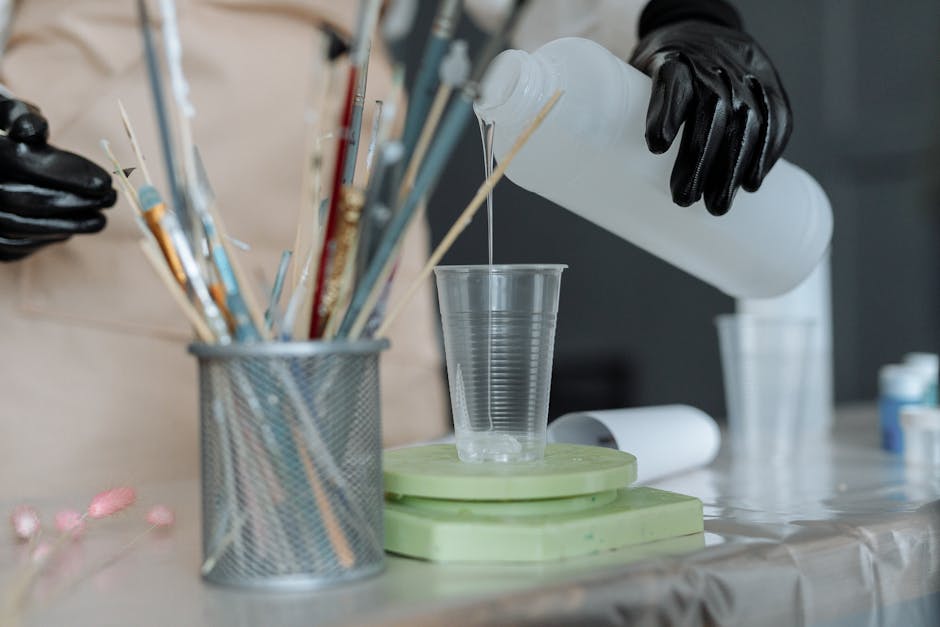
- You need a thorough wash that removes uncured resin from both external surfaces and recessed areas.
- You need a controlled post-cure that drives the reaction to completion.
If you’re using a dedicated curing setup like SUNLU UV Resin Curing Box, you can keep post-curing more consistent—especially when you’re printing multiple items.
Post-Processing That Makes Resin Food-Safe in Practice
This is the part most people skip, and it’s where “food safe” either becomes true or stays marketing.
Use this process as a safety checklist for direct-contact or near-contact items:
- Confirm the resin’s claim: Read the exact wording on “food-contact” and any conditions (fully cured requirement, recommended coatings, temperature limits).
- Print with a cleaning-friendly orientation: Angle parts so supports and resin channels don’t create hidden pockets where uncured material can hide.
- Remove parts promptly but allow cure behavior: Follow your printer’s normal workflow so you don’t leave prints sitting with uncured resin residue.
- Wash thoroughly in fresh cleaner: Use clean wash liquid (not reused sludge) and ensure recessed areas get flow/coverage.
- Wash time plus motion: Don’t just soak—gently agitate so suspended resin has a chance to detach from micro-texture.
- Dry completely before post-curing: Residual wash solvent can interfere with cure and can create residues you don’t want in food areas.
- Post-cure for full conversion: Cure long enough to reach the “fully cured” state described by the resin instructions; don’t rely on the initial exposure alone.
- Inspect for uncured spots: Check for sticky patches, dull or tacky areas, and softened edges that indicate incomplete cure.
- Finish the surface to reduce residue trapping: Sand and/or polish to reduce roughness, seams, and micro pits—then clean again.
- Use a barrier coating when required: If the resin’s guidance expects a food-safe coating, treat that coating as part of the safety system and apply it correctly.
That checklist may sound strict, but it’s the difference between “a print that looks cured” and “a print that behaves safely when repeatedly cleaned and used.”
Choosing the “Best” Resin for Your Food-Safe Use
The best resin for food-safe printing depends on how close the printed part gets to actual food contact, and whether you’re willing to do the full finishing workflow.
- If you need direct contact (like utensils): prioritize resins that are explicitly marketed for food-contact under conditions, then follow cure, finishing, and barrier steps closely. In many real-world setups, a barrier coating and careful surface finishing are essential.
- If you only need indirect contact (like a display piece used near food): you can often use more typical resins, because the safety requirement is much lower. Even then, you still want complete cure so the item is cleanable.
- If you want reusability and durability: choose resins and coatings that are compatible with repeated cleaning and the temperatures you’ll actually see.
- If you’re not prepared for post-processing: the “best resin” won’t compensate for shortcuts. Incomplete washing or under-curing is the most common failure path.
The practical rule: don’t pick resin based on a single label. Pick based on the full workflow the label assumes—cure method, finishing expectations, and whether a barrier layer is part of the solution.
PriceIt3D may earn a commission when you buy through links on this page, at no extra cost to you. Affiliate notice.