Heat creep and hotend clogs look random—until you know what to watch for. In an FDM hotend, the goal is simple: keep the “melt zone” hot enough to flow, and keep the “cold side” cold enough that filament stays firm.
Below you’ll learn how to spot early warning signs, how to dial in temperature and cooling to stop heat from climbing, how to clean and unclog your hotend step-by-step, and how to reduce jams for PLA, PETG, and more heat-sensitive polymers.
Heat creep and hotend clogs: the symptoms you should catch early

Common symptoms include:
- Under-extrusion that worsens over time during a print, especially on longer jobs or high ambient-temperature environments.
- Clicking sounds from the extruder, then longer pauses, then extrusion stops.
- Filament oozing at the nozzle during idle (a sign the nozzle area is too warm or cooling is failing).
- A “plug” that forms after a successful purge—your next start feeds poorly and may not recover even after a short purge.
- For some materials, you’ll see heavier stringing and inconsistent extrusion right before the jam.
A quick diagnostic: if the first layer prints fine but feeding degrades mid-print, suspect heat creep. If the printer fails immediately at start or after a filament change, suspect a feed path issue (wrong temperature, bad filament end, partial jam, moisture, or a disturbed PTFE/bowden setup).
Temperature, fan, and duct best practices that stop heat creep

-
Use the lowest effective nozzle temperature
Running too hot softens filament in the wrong places and increases ooze. Start from the material’s typical temperature range, then reduce in small steps while maintaining stable extrusion. -
Keep cooling airflow consistent (and don’t “improve” it blindly)
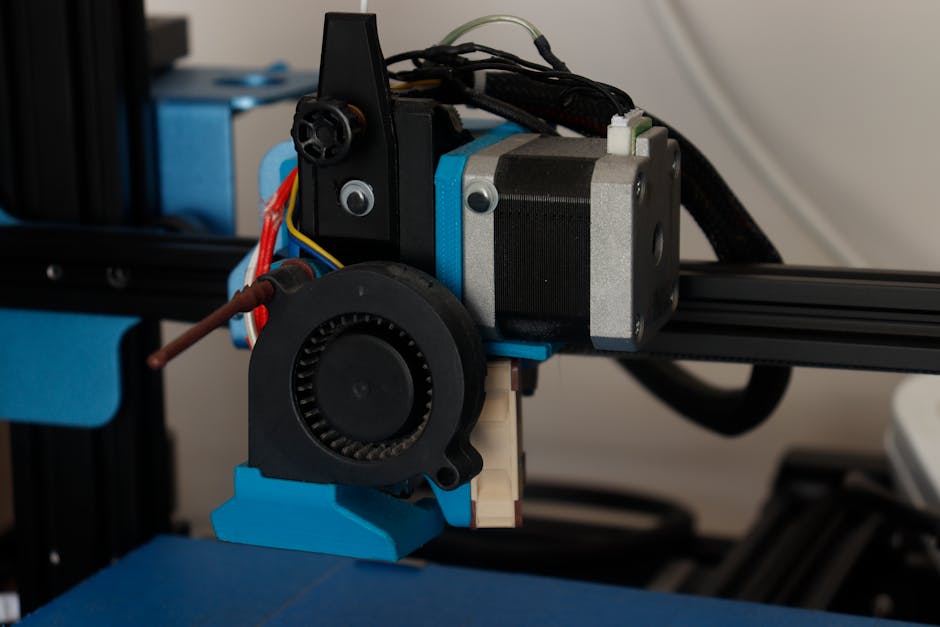
Most heat creep problems get worse when heatsink cooling is weak, intermittent, or misdirected.
- Make sure the heatsink fan is powered and spinning at a steady speed.
- Confirm there’s no debris, melted plastic, or dust blocking airflow.
- If you’ve recently swapped fans or printed duct parts, verify they still align with the heatsink fins and don’t leave gaps.
-
Optimize part cooling separately from heat break cooling
Part cooling fan airflow is meant to cool the printed model and sometimes the upper hotend area. It should not be treated as your primary heat-break cooling solution. If you reduce part cooling too far (or disable it for “better adhesion”), model temperatures can rise and worsen overall conditions around the hotend. -
Check for a “thermal gap” problem in the cold end
If your heat break isn’t seated correctly or a heatsink/heat break assembly has loosened, heat transfer changes. This can make the cold side warmer than intended, even if your temperatures look “normal” in the slicer. -
Watch your print environment
Drafts, poor ventilation, and enclosed spaces can raise ambient temperatures and reduce the cooling advantage of your heatsink fan. If you print in a warmer room or inside an enclosure, expect to tune cooling more carefully and consider limiting long high-flow prints. -
Avoid long idle at high temperature
If your hotend sits at printing temperature for long pauses, filament softens more than it should. If you must pause, lower the nozzle temperature to the minimum that keeps the filament from solidifying (or resume with a purge only when needed).
Preventive checks that reduce jams before they start
These are the highest-impact adjustments to do before you chase a clog.
-
Verify the heatsink fan ducting and alignment
Make sure duct parts aren’t cracked, shifted, or blocked. Airflow should be directed across the heatsink fins, not just “somewhere near” them. -
Calibrate temperature for each material run
Use a stable temperature that extrudes cleanly. If you need to run hotter than usual for a material, investigate moisture, worn nozzle, or a partial restriction. -
Match retraction settings to your filament and path
Over-retraction can pull softened filament upward (worsening heat creep) or create heat soak artifacts. Under-retraction increases pressure build-up and stringing that can eventually form a plug. -
Keep filament dry and consistent
Moisture can cause bubbles and inconsistent flow, which increases the chance of partial blockages. Store filament sealed, and dry it when you see persistent popping or rough extrusion. -
Don’t let the nozzle go “stale” with burned residue
Repeated purges at high temperature can leave char. If your extrusions look increasingly dusty, filament stops and starts more often, or purge blobs turn dark, schedule a cleaning. -
Inspect the filament end before loading
If the filament end is chewed, melted, or angled, it can fail to feed cleanly into the melt zone and start a restriction.
How to clean and unclog your hotend step-by-step
Cleaning works best when you treat it like restoring a controlled thermal path: remove residue, restore clear flow, then confirm extrusion consistency.
-
Heat the nozzle and unload safely
Warm the nozzle to a temperature appropriate for the filament you’re removing, then unload filament completely. Wipe the nozzle exterior with a clean cloth (or nozzle wipe) to remove surface ooze. -
Do a “purge test” to confirm where flow stops
With filament loaded, extrude a small amount while observing for smooth flow. If extrusion is thin, intermittent, or stops quickly, you likely have a partial clog. -
Perform a cold-pull if your hotend supports it
Heat the nozzle to the material’s softening range, then reduce temperature partway while keeping tension on the filament. When the filament firms up, pull it out. Repeat once or twice.
- This is often effective for PLA and many common filaments.
- For difficult materials, multiple short cold pulls can remove residue where purging alone can’t.
-
If cold pulls don’t work, do targeted needle cleaning
With the hotend heated, use a compatible cleaning tool (like a fine nozzle-cleaning needle) to gently clear the nozzle tip. Avoid forcing anything aggressively—damage to the nozzle tip can make clogs more frequent. -
Remove stubborn heat-soaked residue
If you see persistent dark buildup, heat the nozzle to the upper end of the recommended range for a brief purge, then immediately unload and wipe again. Don’t keep it high for long periods—this can worsen heat creep. -
Check the heat break and transition area (only if safe for your setup)
If you have a removable heat break or accessible interface, inspect for filament blobs or residue. A tiny “bump” at the wrong spot can trigger repeated jams. -
Reassemble and run a controlled extrusion + first-layer test
Before starting a long print, do a short extrude and a small test print. Stable flow and consistent first layers confirm the hotend is clear and cooling is working.
If the hotend clears but clogs return quickly, don’t keep repeating the same cleaning loop—go back to temperature/cooling checks and the material-specific section below.
Reducing jams by material: PLA, PETG, and heat-sensitive polymers
Not all filaments behave the same way in the transition zone. Heat creep and clogs often become material-specific once the baseline cooling is correct.
PLA
PLA is usually less challenging than PETG, but it still clogs when heat creeps or when temperatures are set too high.
- Keep nozzle temperature closer to the lower/middle part of PLA’s typical range.
- Ensure fans that cool the cold side and the model are behaving as expected.
- If you see jams after a few hours, it’s often not “PLA being hard”—it’s heat creep building up as the hotend warms in the print environment.
PETG
PETG tends to string, ooze, and form sticky residue if conditions aren’t dialed in.
- Reduce nozzle temperature carefully, because PETG often needs enough heat to flow but not so much that it keeps softening above the melt zone.
- Use consistent retraction tuned for your setup to reduce oozed strands that can eventually become residue.
- If you frequently find a crusty buildup at the nozzle tip, cleaning and better temperature discipline usually helps more than repeatedly raising temperature.
Heat-sensitive polymers
For polymers that soften or degrade more easily, the priority is keeping the cold side cold and minimizing dwell time at high temperature.
- Start at the low end of the recommended temperature range and raise only if extrusion is weak.
- Avoid long nozzle idle at print temperature; if you pause, drop temperature to the minimum that keeps flow safe.
- Be extra strict about cooling duct and heatsink fan health—heat creep is more punishing with these materials.
- Dryness matters: inconsistent flow can create partial obstructions that become clogs.
A practical way to prevent recurring jams is to treat “temperature vs. cooling” as a system. If you must print hotter for a polymer, you’ll usually need stronger cooling (working ducting, clean heatsink, reliable fan) to maintain a sharp boundary between melt zone and cold end.
A practical verdict: what to do next
If your extrusion performance slowly degrades mid-print, focus first on heatsink cooling, duct alignment, and lowering nozzle temperature to the lowest stable value. If your printer fails right at startup or after a filament change, clean the hotend and verify feed conditions (filament end quality, retraction, and the filament path.
Next step that pays off fastest: run a short purge-and-extrude test after you clean, then start a small calibration print while monitoring for early under-extrusion or clicking. Those first minutes tell you whether the hotend is truly clear and whether heat creep has been addressed.
PriceIt3D may earn a commission when you buy through links on this page, at no extra cost to you. Affiliate notice.