Ringing and ghosting look like extra shadows on your edges, especially on sharp corners and fast travel moves. The good news: in most cases it’s not a mystery print “quality” problem—it’s vibration you can reduce with the right order of tuning.
This guide walks through an end-to-end approach: identify what you’re seeing, check the mechanical sources of wobble, then dial in speed/acceleration limits and slicer motion settings that specifically target ringing.
Spot the type of ringing and where it shows up

- Even ripples trailing both sides of a corner (often with a few repeated waves): classic resonance excited during fast direction changes.
- A “ghost edge” offset from the intended outer wall: often related to junction behavior (how the printer transitions between line segments) plus mechanical slop.
- Worse ringing on tall parts or the Z direction: can indicate loose couplers, belt tension imbalance, or gantry/rail stiffness issues.
- Only outer perimeters show it: frequently a slicer motion/acceleration issue—outer walls follow different paths than infill.
If you can, note two things: which axis it’s strongest on (X/Y cornering vs. Z motion) and what speed you were printing at. Those two clues help you decide whether to start with hardware checks or motion limits.
Fix mechanical vibration sources first (belt, rods, rails, play)

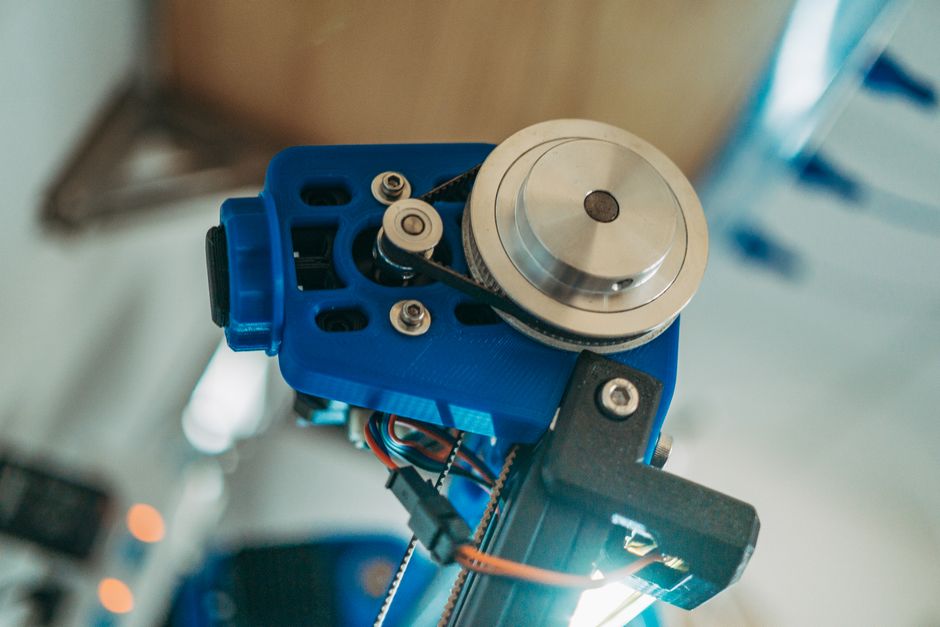
- Check belt tension and pulley alignment: belts that are too loose can flutter; too tight can add stress and also transmit vibration. Ensure pulleys are aligned and belts track straight.
- Tighten eccentric nuts/roller preload (for rail systems): rollers should roll smoothly with minimal side-to-side play—too loose causes wobble, too tight can bind and create inconsistent movement.
- Verify smooth rod/rail movement: with power off, move the toolhead/gantry by hand. You should feel smooth travel without clicking, tight spots, or obvious resistance changes.
- Inspect and snug end stops, brackets, and couplers: check screws, bearing mounts, coupler set screws, and any adapter plates that hold the motion components.
- Eliminate backlash in lead screws and drive systems: if you can feel a “dead zone” when you reverse direction (hand-check), ringing can appear because the printer changes motion before steps fully translate to movement.
- Re-check gantry/bed leveling without forcing the structure: uneven loading can preload one side and contribute to vibration, especially during fast cornering.
- Confirm the toolhead is rigid and cables aren’t dragging: cable snagging or a cooling duct that contacts the part mid-move can create repeatable oscillations.
- Manage cooling duct and fan shroud clearance: a duct that vibrates or oscillates (even slightly) can add high-frequency motion right where the extruder is printing.
- Inspect wheels, bearings, and any belt tension idlers: worn bearings or loose idlers often show up as intermittent ringing that gets worse at certain speeds.
- Consider safe damping only if your machine design allows it: small, well-supported ways to reduce resonance (for example, isolating a vibrating mount or improving mounting contact) can help, but avoid anything that loosens fasteners or changes safety-critical clearances.
After you do these, do a quick re-check: run a short print at your normal settings and watch a few corners. If the ghosting is still identical in the same spots, move on to motion and slicer tuning.
Limit speed, acceleration, and jerk to reduce excited resonance
Ringing is often the printer “punching” the mechanical system with abrupt acceleration and direction changes. Slowing down doesn’t just reduce overall stress—it reduces the frequencies your setup can amplify.
Start with the largest levers:
- Maximum acceleration: Lowering acceleration reduces how quickly the controller ramps up/down force. This usually has the biggest impact on ringing amplitude.
- Maximum velocity: Lower velocity can reduce how hard fast cornering excites oscillation, especially on travel-heavy prints.
- Jerk / junction behavior: Many firmwares use a form of “jerk” or junction deviation to decide how aggressively to change direction at the join between segments. More aggressive cornering settings can make ghosting much worse.
Practical approach: reduce values in small steps, print a corner-heavy test shape, and compare. If ringing drops a lot, you’re close. If nothing changes, the issue may be mechanical play or vibration at a specific resonance frequency.
If your firmware exposes more than one related parameter (common with junction/jerk controls), focus on the one that changes how sharply the toolhead turns (junction behavior) rather than only overall max speed.
Use vibration-aware motion settings when your firmware supports it
Some firmware setups can compensate for resonance instead of just brute-forcing slower motion. If you have access to these features, they’re often the fastest path to clean edges.
Look for options that do one or more of the following:
- Input shaping / resonance compensation: the controller modifies motion commands so the system is less likely to excite its natural frequencies.
- Pressure or linear advance: this doesn’t directly fix ringing the way input shaping does, but it can reduce extrusion wobble during fast transitions, which sometimes shows up as ghosty edges.
- Smoothing / motion profiling: controls that make acceleration changes more gradual can reduce how abruptly the mechanics get excited.
Use these features like this: enable the compensation method, run its required calibration or measurement workflow (if your firmware needs it), then re-tune max acceleration/junction limits afterward. In many setups, you still need conservative limits—compensation helps, but it doesn’t make an unstable frame rigid.
Tune slicer settings that target outer-wall ringing
Slicer motion settings can worsen (or improve) ringing because they change exactly how perimeters and corners are generated. After hardware and motion limits are stable, adjust the slicer.
Key slicer targets:
- Outer wall speed vs. inner speed: ringing is often most noticeable on outer perimeters. Lower outer wall speed first, or apply a per-feature speed reduction.
- Cornering behavior: settings related to “junctions,” “square corners,” or “adaptive speed” can change how quickly the toolhead transitions. If your slicer has a “square corner velocity” style control, reducing it usually helps ghosting.
- Acceleration overrides for walls: some slicers allow different acceleration limits for different features. Cap the perimeters (especially outer wall) more aggressively than infill.
- Minimum layer time / cooling-driven throttling: if cooling and flow cause the printer to ramp speed unpredictably, it can reintroduce ringing. Make sure the printer isn’t repeatedly forcing abrupt speed changes mid-layer.
- Coasting or extra wipe moves: while these are mostly about extrusion accuracy, they can change how the last bit of extrusion finishes at corners. If ghosting is tied to the end of perimeter lines, experiment with turning these features off temporarily for diagnosis.
What to avoid while tuning: making too many changes at once. Pick one “theme” per test. For example, keep hardware and motion limits fixed and only adjust outer wall speed and corner/junction-related slicer controls.
Print a focused test and lock in stable settings
Once you’ve made both mechanical corrections and motion/slicer adjustments, verify with repeatable tests.
Aim for a model or test that includes:
- Lots of sharp corners (where ringing is most visible)
- At least two heights (to see whether Z and structural stiffness matter)
- A consistent perimeter type (outer walls where ghosting shows)
Then tune in this order for the cleanest results:
- Bring ringing down using acceleration/junction limits.
- If your firmware supports it, enable and calibrate input shaping (or the equivalent resonance compensation feature).
- Finally, refine slicer corner behavior and outer-wall speed.
Your practical verdict: if ghosting stays large even at reduced speeds and acceleration, treat it as a mechanical issue (tension, play, wheel/rail preload, belt alignment). If it improves as you lower junction sharpness and acceleration, treat it as a motion tuning issue and keep iterating around those settings.
The one next step that usually pays off: run a corner-heavy test after each major change (hardware vs. motion vs. slicer) so you can see which adjustment actually reduces the “ghost” edges instead of guessing.
PriceIt3D may earn a commission when you buy through links on this page, at no extra cost to you. Affiliate notice.